Vue项目接口防刷加固:接入腾讯云天御验证码实现人机验证、恶意请求拦截
本文最后更新于 2026年3月16日 晚上
我们在设计公共业务接口的时候(e.g. 登录、公共 API 请求等),为了防止恶意请求,我们通常会采用人机验证、恶意请求拦截等手段来保护我们的接口。本文将在 Vue3 项目基础上介绍如何使用腾讯云天御验证码来实现人机验证和恶意请求拦截。
人机验证
网站的数据通常都是列表、分页展示,存在一定的规律,比如 WordPress 的评论列表,每页显示 10 条,每次的翻页就是通过 API 接口提取数据库的数据进行展示。 如果没有人机验证或者恶意请求的拦截,那么攻击者就可以通过爬虫程序,模拟用户行为,不断发起请求,获取数据,从而造成数据泄露、服务器负载过高、带宽消耗过大等问题。
除了后台 API 限制请求频率这种“保守防御”,我们可以采用一些更“精巧”的方式。比如本文介绍的验证码,通过人机验证,可以有效地防止爬虫程序的恶意请求。

人机验证码
验证码服务,其实形式很多。早些年登录 QQ 时候,弹出的“请输入图形中的数字/字母”就是一种验证码服务。原理就是通过随机生成一张图片,图片中包含一些数字或字母,让用户输入,如果输入正确,则允许登录,否则拒绝登录。
flowchart LR
    A[👤 用户访问] --> B[🎲 生成验证码]
    B --> C[📤 提交验证]
    C --> D{🔍 校验结果}
    D -->|✅ 成功| E[🎉 通过验证]
    D -->|❌ 失败| B

    style A fill:#e3f2fd,stroke:#1976d2
    style B fill:#fff3e0,stroke:#f57c00
    style E fill:#e8f5e8,stroke:#388e3c
输入图形数字这种形式已经很少了,随着样本数据和计算能力的提升,图形数字能拦截的基本只有“真人”。现在更流行的是滑动验证码、点选验证码、语音验证码等。比如: 我们这次介绍的腾讯云天御验证码。
滑动验证码
滑动验证码,顾名思义,就是需要用户拖动滑块,使滑块与缺口对齐,才能通过验证。这种验证码形式,判断用户能否把滑块对齐缺口只是验证的第一步;在验证的过程中,还会判定用户的滑动轨迹是否正常、Cookies是否异常等,只有全部通过,才会认为用户是真人,从而放行。
同时,相比以前传统的后端传图验证码,滑动验证码通常前台验证后,生成票据;后端接口可以校验票据是否有效,从而减少后端压力。类似于 JWT 这种模式。
视频演示
为了让大家更直观地感受各家验证码在适配后的样式效果,录制了一个 1.5min 的演示视频。
做教程视频不易(技术教程,受众小,B站根本不会推荐引流,甚至经常把我回复的技术评论屏蔽),请务必一键三连嗷~
- Bilibili 视频地址:https://www.bilibili.com/video/BV1MMpXzME6P
- Youtube 视频地址:https://www.youtube.com/shorts/r7bgseGbgkI
天御验证码
我们这次就以天御验证码为例,介绍如何接入人机验证和恶意请求拦截。腾讯云天御验证码的官网地址是:
使用的场景一般在网站、APP、小程序等场景,看到官方有 React 的接入指南,但是没有 Vue,其实原理差不多,这次我们自己封转一个 Vue 组。
原理是前端请求验证码的接口,用户完成验证后,返回票据;之后前端携带票据到后端验证票据是否有效:
sequenceDiagram
    participant U as 👤 用户
    participant F as 🌐 前端
    participant C as 🛡️ 验证码服务
    participant B as 🔐 后端

    U->>F: 访问页面
    F->>C: 请求验证码
    C->>F: 返回滑块验证
    U->>F: 完成验证
    F->>C: 提交结果

    alt 验证成功
        C->>F: 返回票据 🎫
        F->>B: 携带票据请求
        B->>C: 校验票据
        C->>B: 验证结果
        B->>F: 返回数据 ✅
    else 验证失败
        C->>F: 验证失败 ❌
        F->>U: 重新验证
    end
使用体验
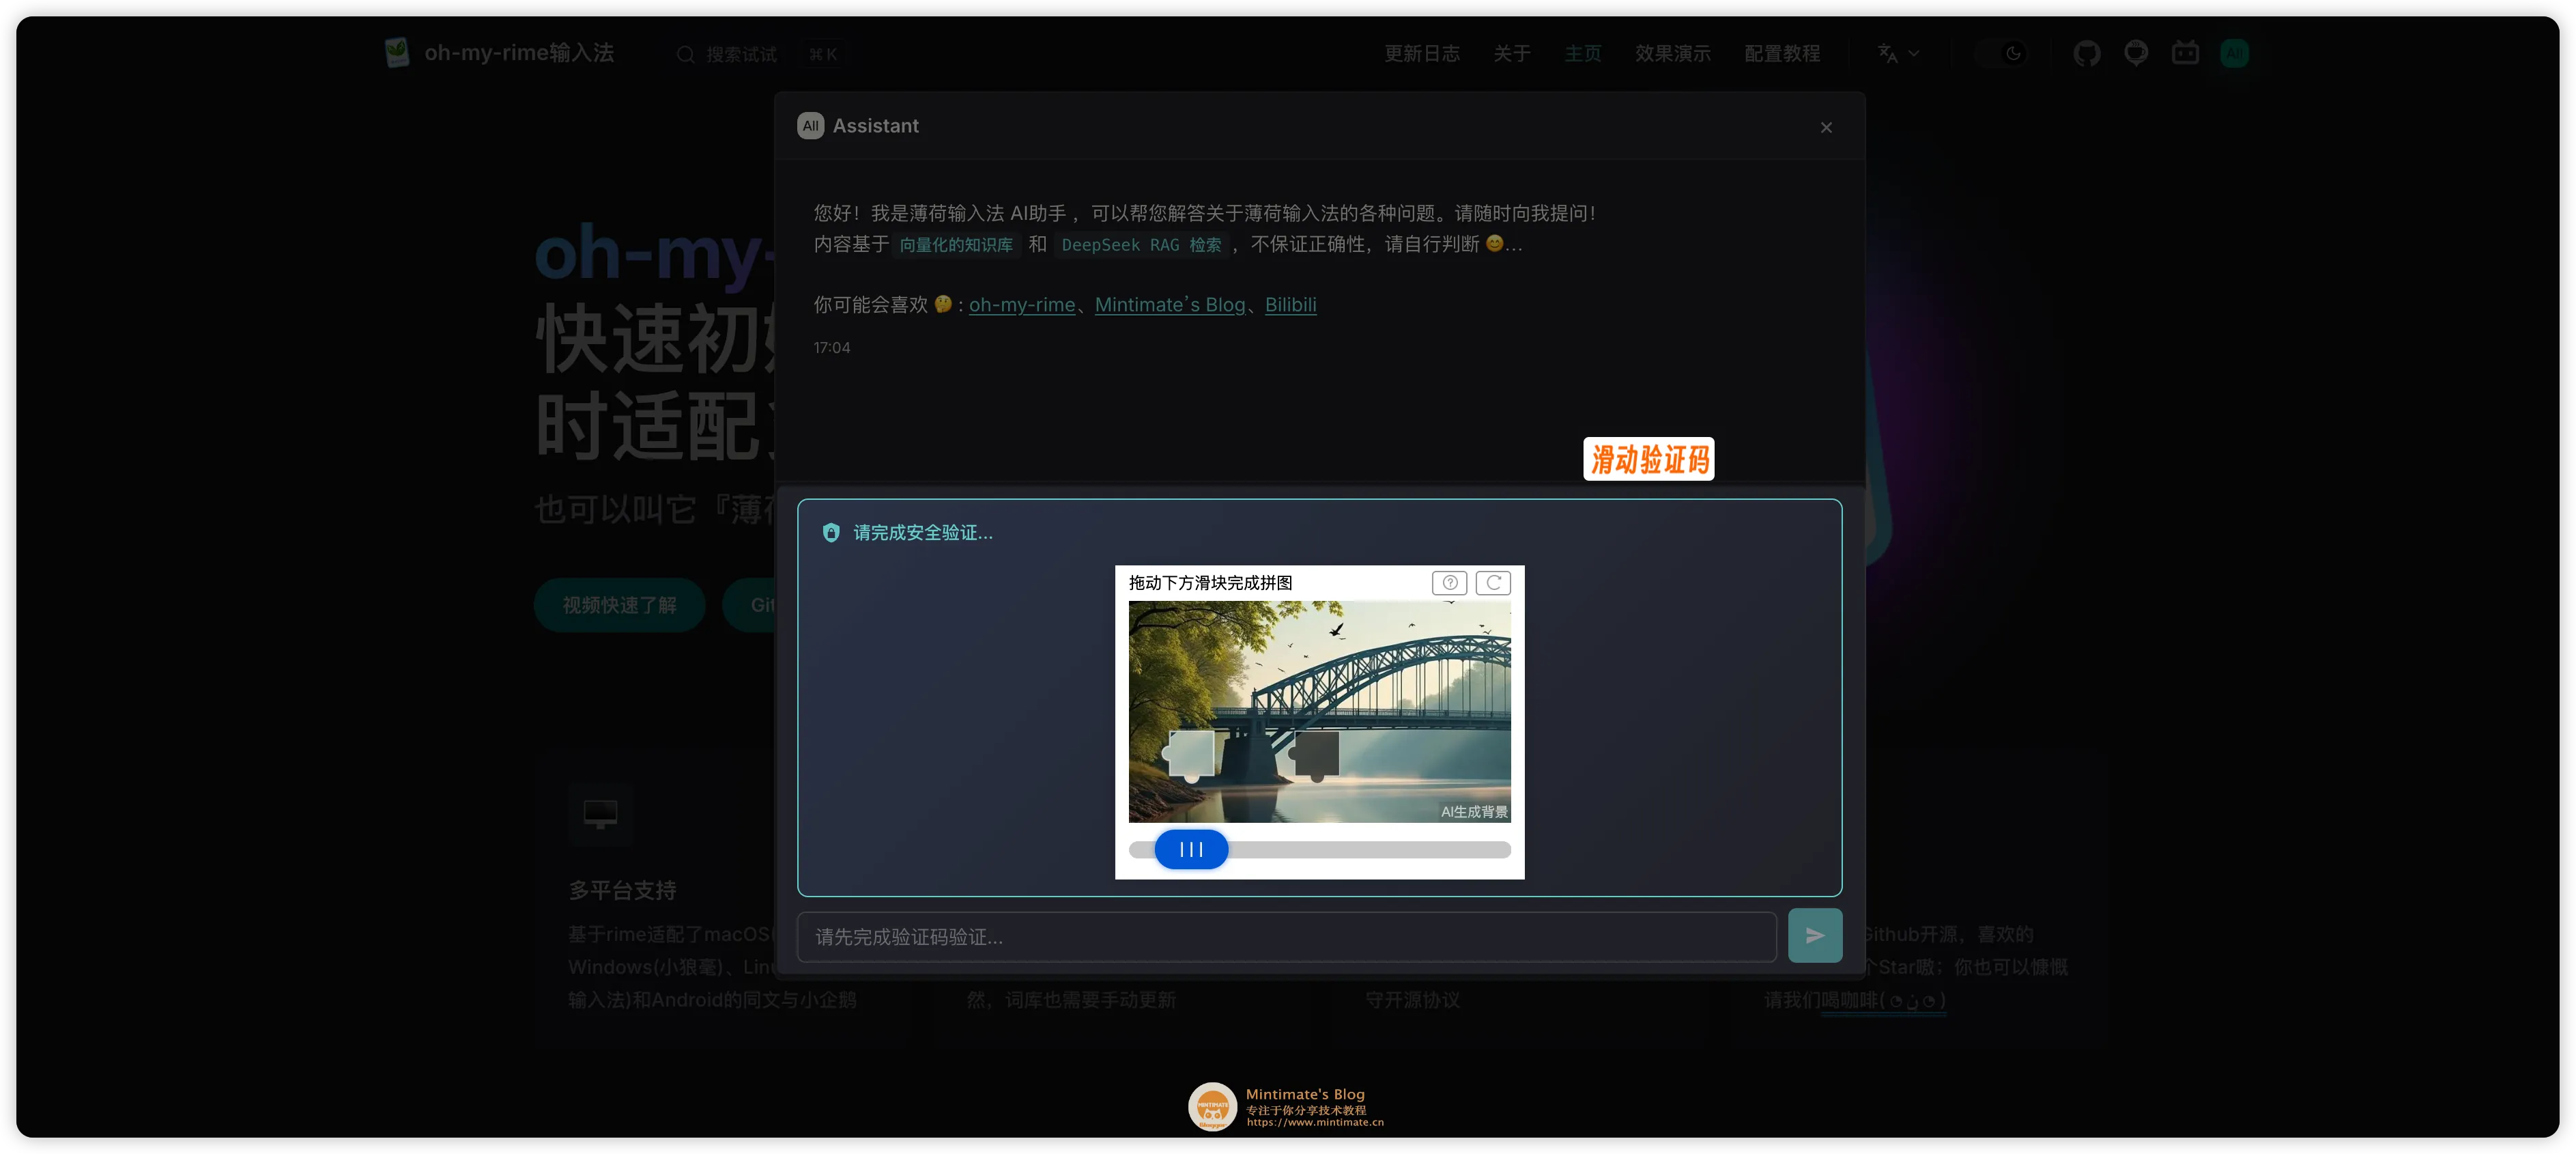
在教程正式开始之际,我们来看一下最后的接入效果 🤔?

可以在 薄荷文档 上的 AI 功能进行提问,会自动触发验证码,如下图所示:
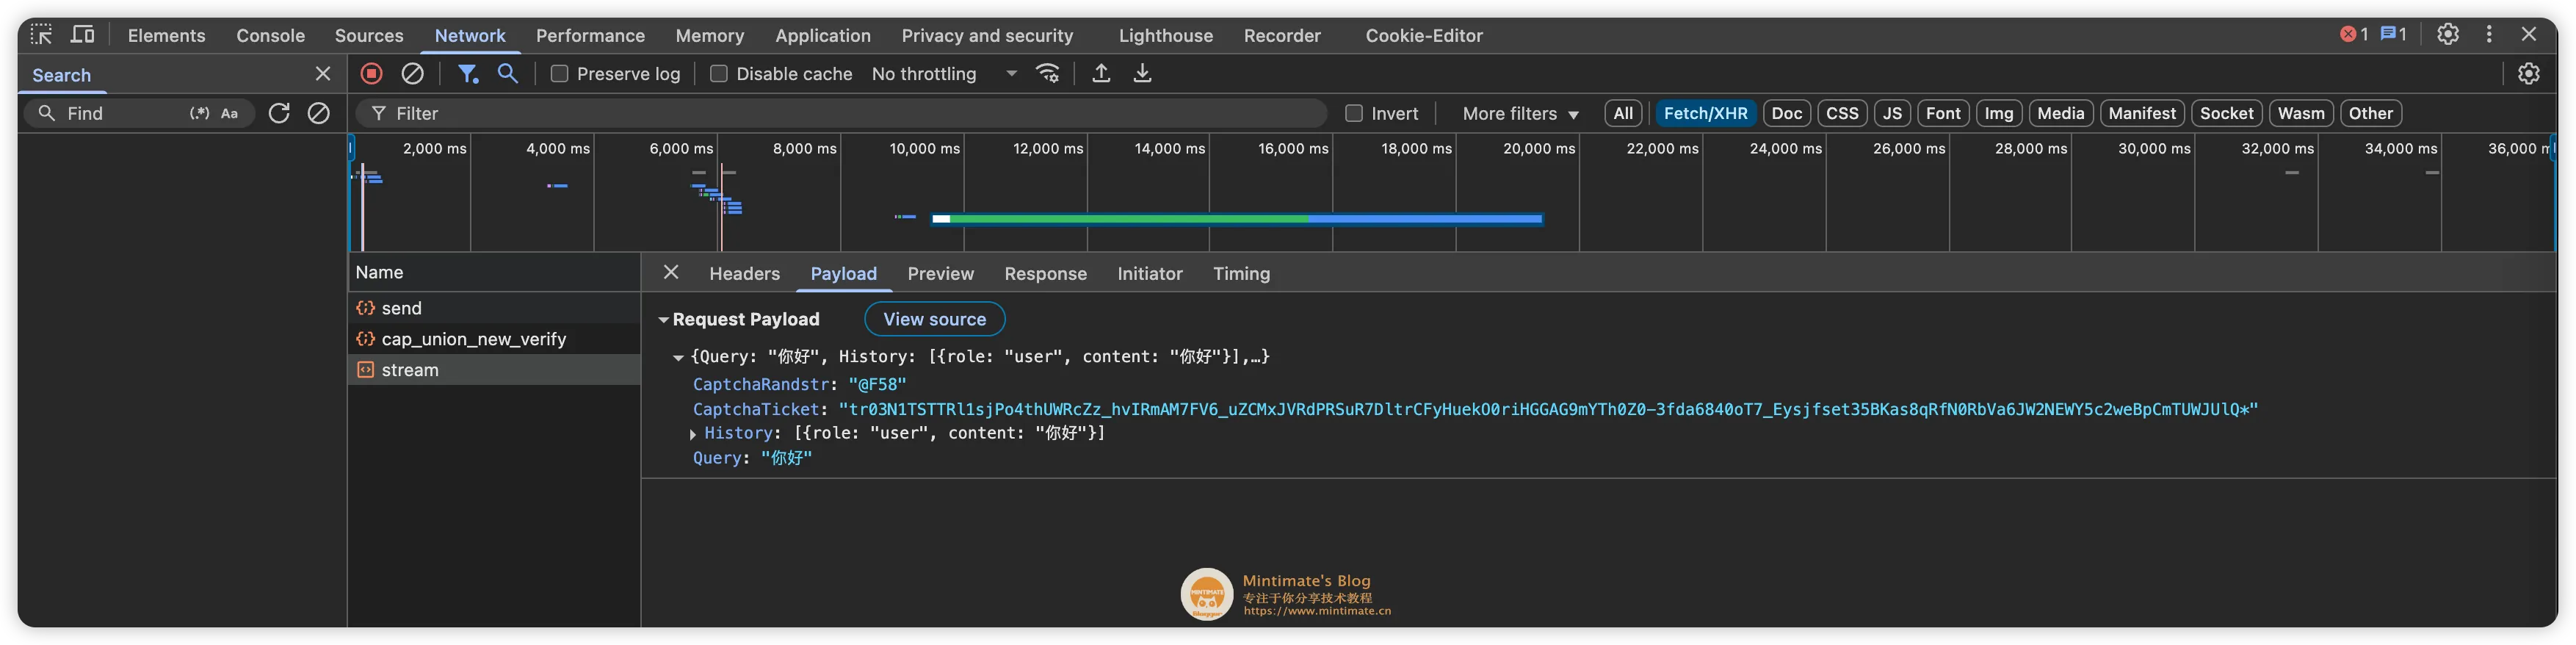
我们通过验证后,把前端会把生成的票据作为参数传递给后端,后端验证票据的有效性决定是否放行:
当然,你也可以在腾讯云的控制台上,切换验证码的样式、风控等级等:

其实我也是有接入过极验验证码、Google reCAPTCHA的,对比之下主要的区别:
| 对比项目 | 腾讯云天御 | 极验 | Google reCAPTCHA |
|---|---|---|---|
| 验证方式 | 滑动拼图、文字点选、图形选择、VVT空间语义、无感验证 | 仅滑动拼图 | 复合验证(V2)、无感验证(V3) |
| 价格 | 收费 | 低频使用不收费 | 免费(用量限制: 1万/月) |
| 破解难度 | 较高,破解方法和教程较少,特别是VVT空间语义 | 较低,网上破解方法和教程较多 | 中等,基于机器学习算法 |
| 支持平台 | Web/H5、iOS、Android、小程序、鸿蒙 | Web/H5、iOS、Android、小程序、鸿蒙 | Web/H5、iOS、Android |
| 验证流程 | 前端生成票据,后端密钥验证 | 前端生成票据,后端密钥验证 | 前端生成票据,后端密钥验证(注意: Google Cloud 版本的密钥和 reCAPTCHA 版本验证密钥不一样) |
| 安全校验 | 支持客户端和服务端 CaptchaAppId 强制校验 | 不支持强制校验 | 支持域名白名单 |
| 个性化展示 | 弹出式(popup)、内嵌式(embed) | float、popup、bind 三种模式 | 无。不过无感验证体验很好 |
关于极验的定价,咨询了商务。理论上都需要收费,并且最低为1万/年。但是根据论坛小伙伴的说法,个人开发者使用,月度验证次数低的情况下,可以一直使用。
操作前提
基础的网站开发知识,以及 Vue 的基础使用,这里不做赘述。完整的验证码业务,前端请求腾讯云验证码的接口来获取票据,后端接收票据,校验票据的有效性。
本次的操作,我前端就是使用 Vue3,后端就是用的 Golang。
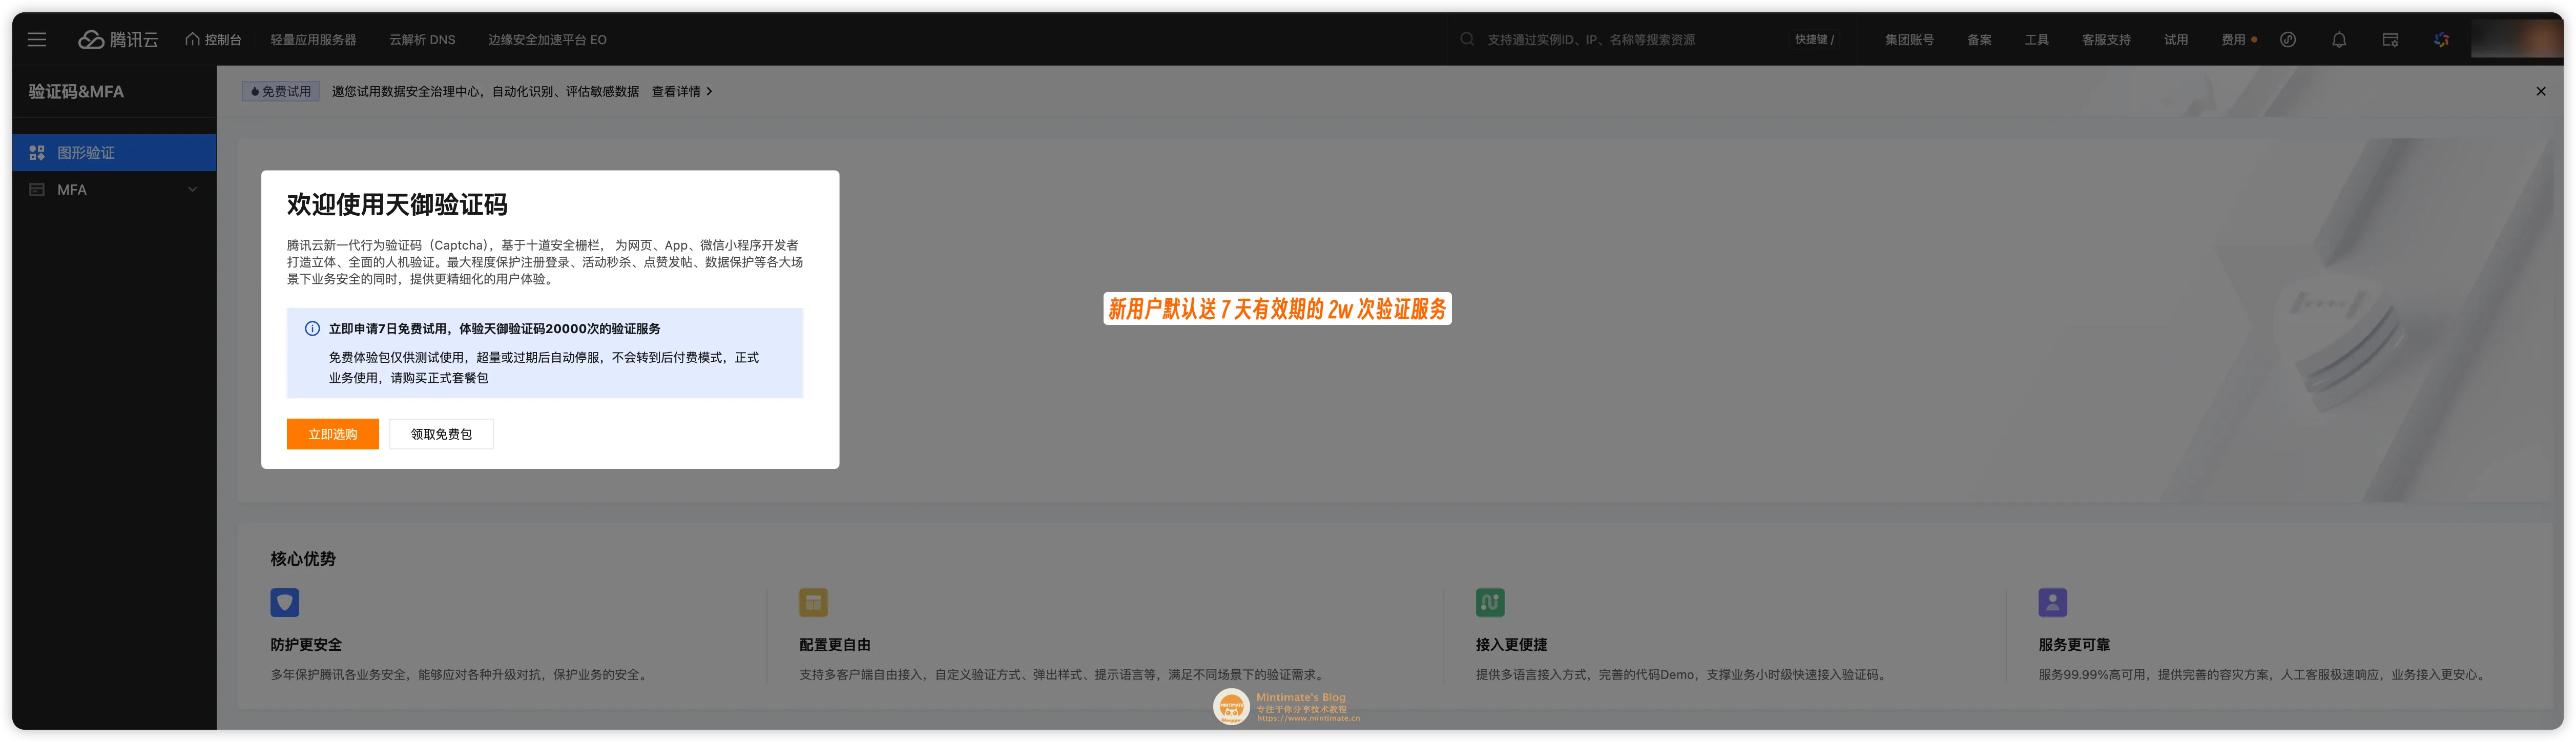
当然,我们需要先开通腾讯云天御验证码的服务,新用户有 2w 次的免费额度,足够我们测试了:
Vue 前端接入
前端的接入,我们可以参考官方的 Web 客户端接入和 React 版本接入Demo 来完成 Vue 的实现。
首先是定义容器,我们创建一个 component 组件,用来承载验证码的组件,并创建一个容器,用来后续的验证码挂载:
1 | |
添加的 props 接受父组件参数。其中:
appId是天御验证码的 CaptchaAppId;enabled表示是否启用验证码,默认为true;show表示是否显示验证码,默认为false;statusText表示验证码状态文案,默认为请完成安全验证...;containerId验证码容器的 ID,默认为captcha-embed;为我们使用验证码的嵌入模式时候,进行替换展示的容器 ID(天御验证码有两种模式,一种是嵌入模式,一种是弹窗模式)。
之后的验证,关键代码自然是触发emit内的success事件,传递票据和随机字符串到上级父组件。
1 | |
我们在父组件中监听 success 事件,把票据和随机字符串传递给后端,从而决定是否响应这次请求:
1 | |
完整的代码可以参考:
我们总结一下 Vue 前端接入的完整流程:
flowchart LR
    A[🚀 开通服务获取AppId] --> B[⚡ Vue组件]

    B --> C{📱 启用验证?}
    C -->|否| D[⏭️ 跳过验证]
    C -->|是| E[🎯 加载验证码]

    E --> F{👆 用户操作}
    F -->|✅ 成功| G[🎫 传递票据到后端]
    F -->|❌ 失败| E

    G --> H[✨ 后端校验]
    D --> H

    %% 样式定义
    style A fill:#4fc3f7,stroke:#0288d1,stroke-width:3px,color:#fff,font-weight:bold
    style B fill:#81c784,stroke:#388e3c,stroke-width:2px,color:#fff,font-weight:bold
    style C fill:#ffb74d,stroke:#f57c00,stroke-width:2px,color:#fff,font-weight:bold
    style D fill:#a1887f,stroke:#5d4037,stroke-width:2px,color:#fff
    style E fill:#f06292,stroke:#c2185b,stroke-width:2px,color:#fff,font-weight:bold
    style F fill:#ba68c8,stroke:#7b1fa2,stroke-width:2px,color:#fff,font-weight:bold
    style G fill:#4db6ac,stroke:#00695c,stroke-width:2px,color:#fff,font-weight:bold
    style H fill:#ff8a65,stroke:#d84315,stroke-width:2px,color:#fff,font-weight:bold

    %% 连接线样式
    linkStyle 0 stroke:#0288d1,stroke-width:3px
    linkStyle 1 stroke:#388e3c,stroke-width:2px
    linkStyle 2 stroke:#f57c00,stroke-width:2px
    linkStyle 3 stroke:#c2185b,stroke-width:2px
    linkStyle 4 stroke:#7b1fa2,stroke-width:2px
    linkStyle 5 stroke:#00695c,stroke-width:2px
    linkStyle 6 stroke:#c2185b,stroke-width:2px,stroke-dasharray: 5 5
    linkStyle 7 stroke:#2e7d32,stroke-width:3px
    linkStyle 8 stroke:#5d4037,stroke-width:2px,stroke-dasharray: 3 3
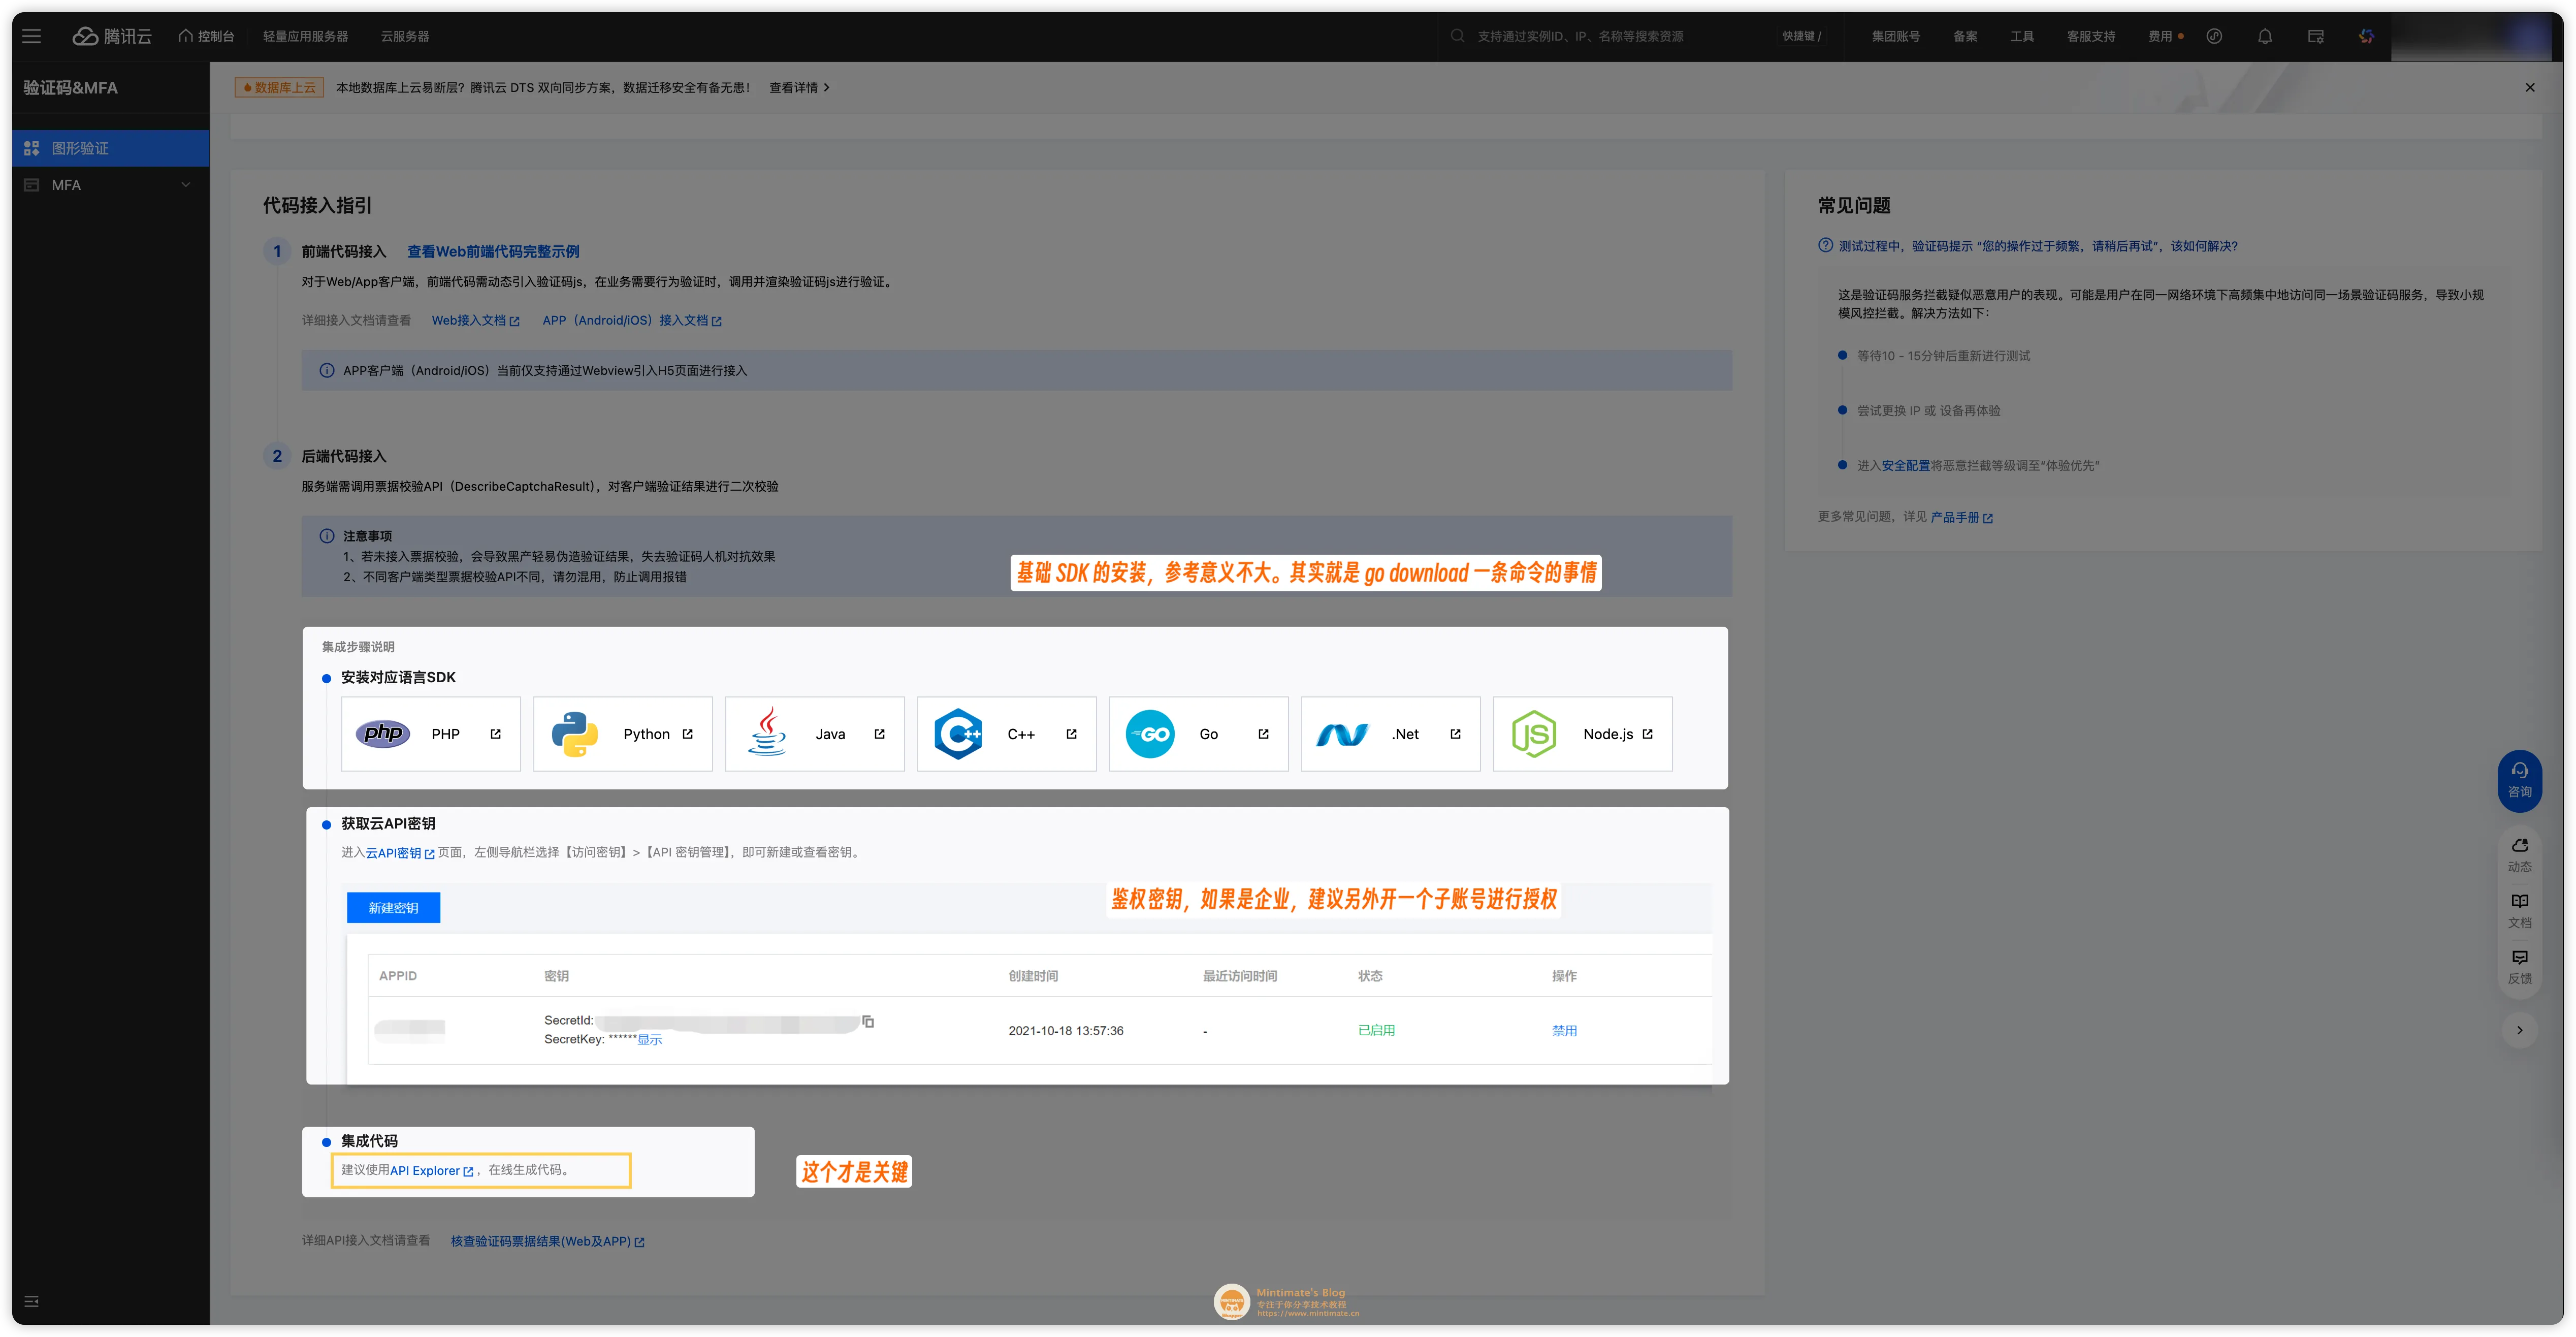
当然,只是解决了前端接入,还需要后端配合,才能真正实现验证功能。接下来就看看后端怎么校验票据有效性。
Go 后端校验
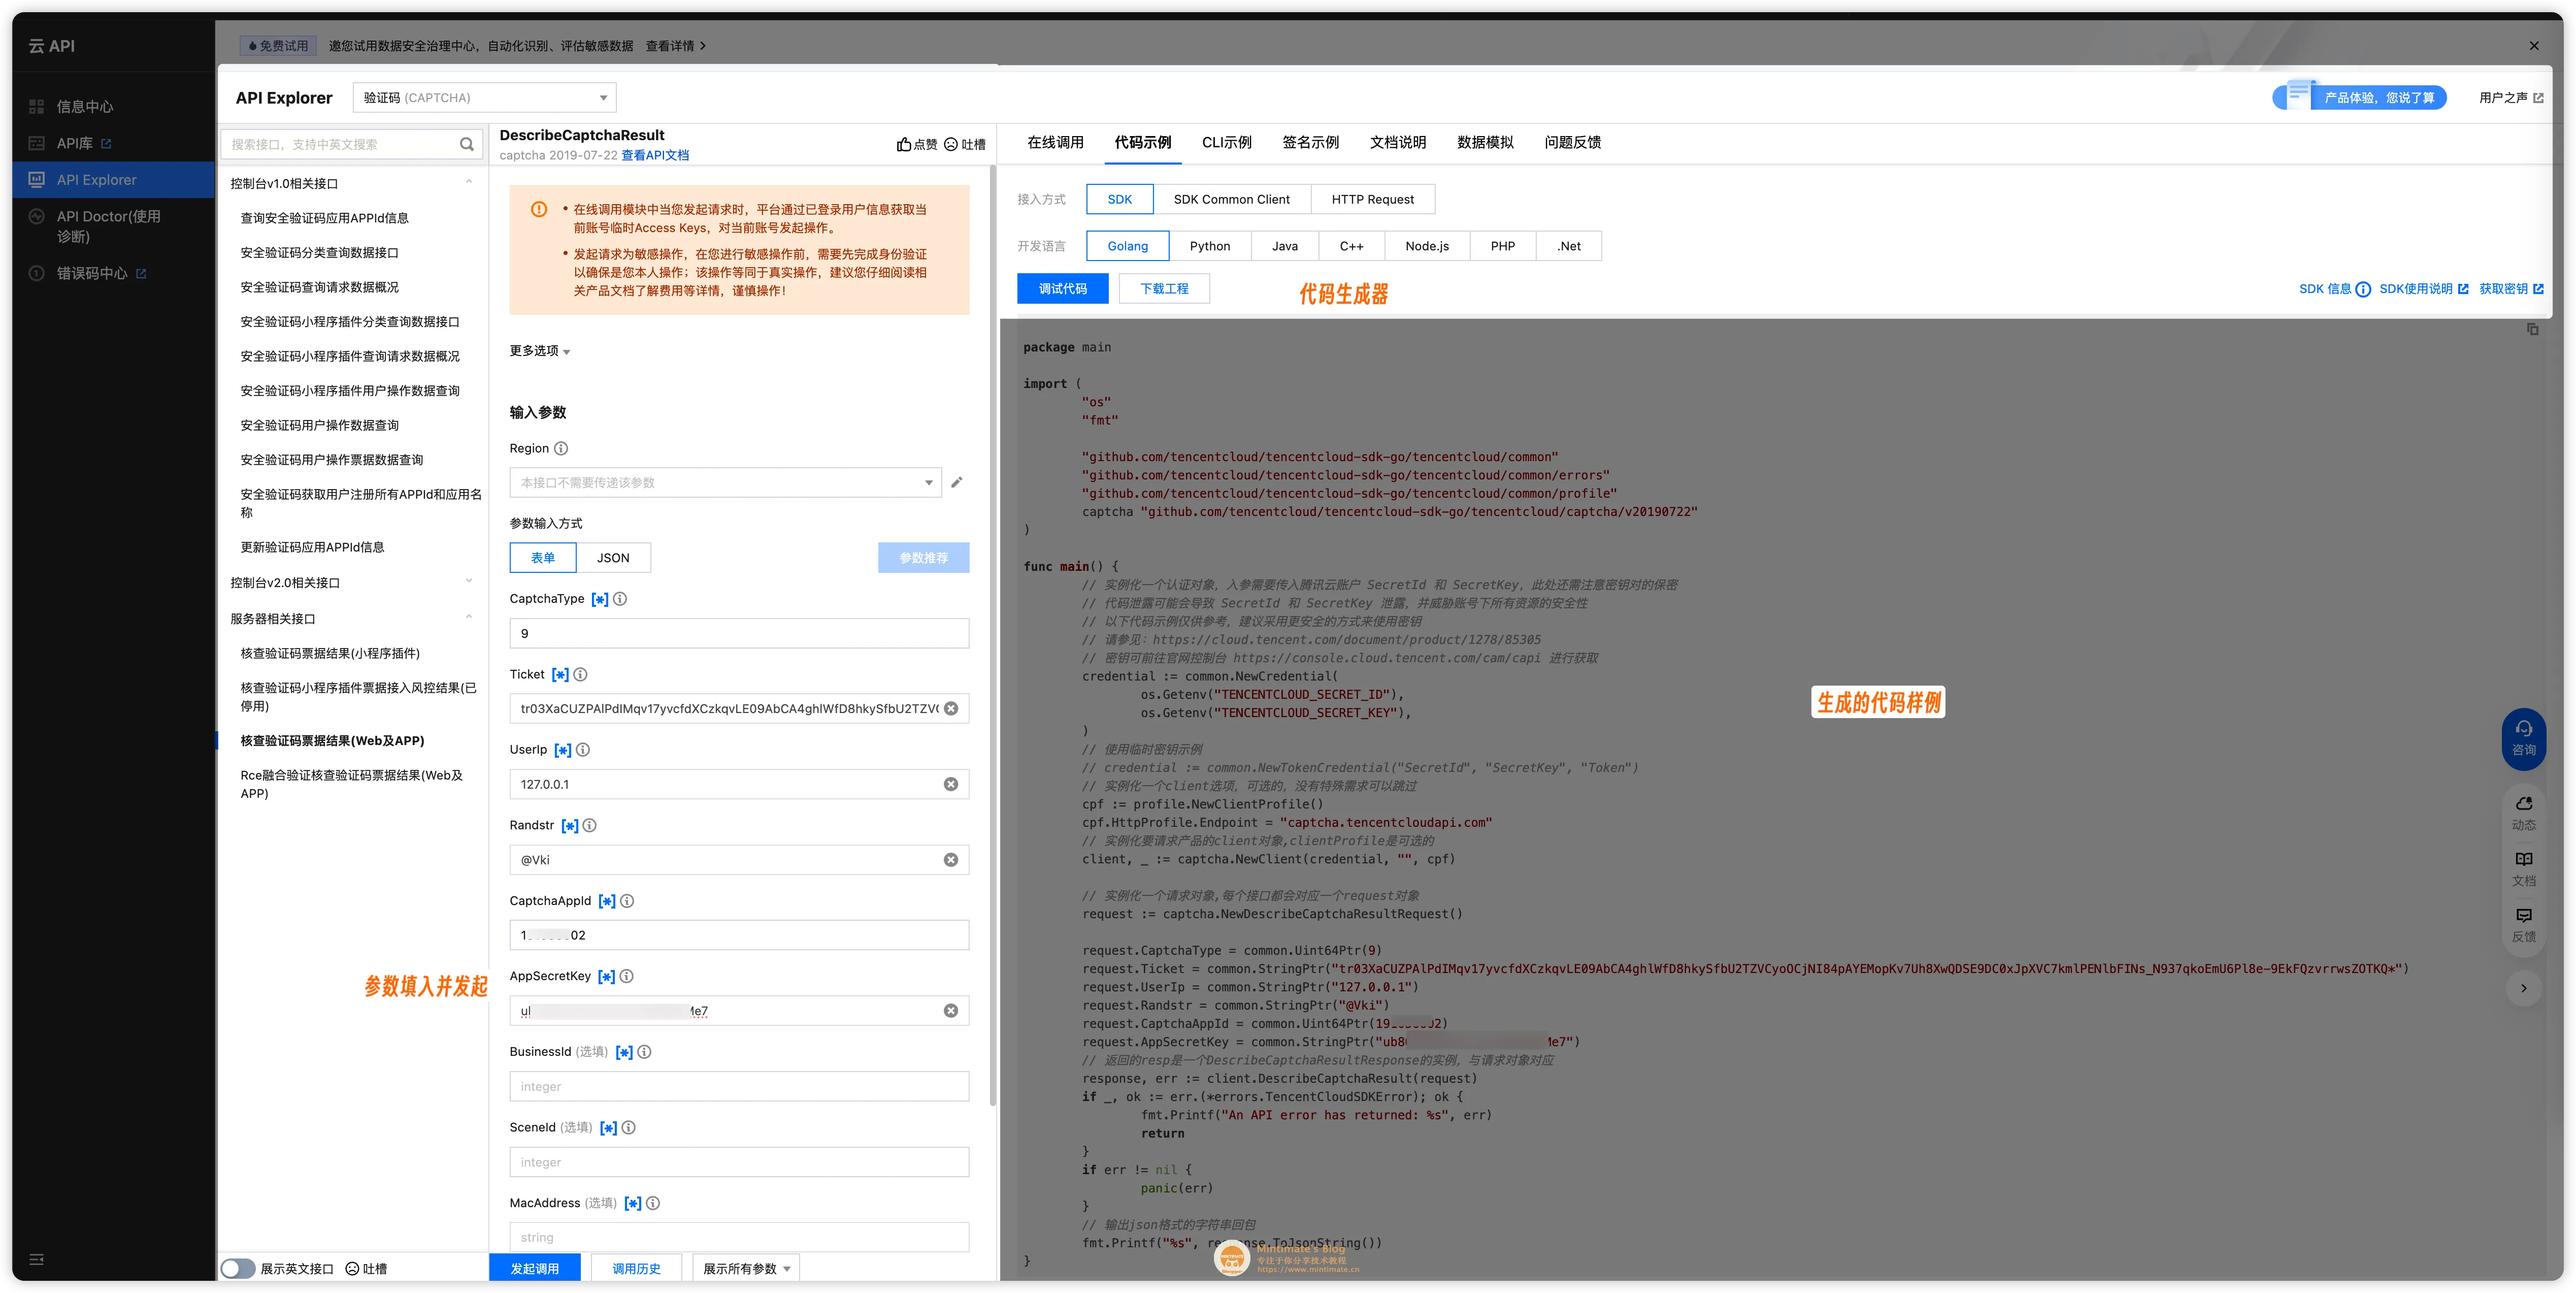
后端的接入,官方的文档直接指引我们到 API Explorer 进行在线调试和代码生成。
在调用成功以后,有一个基础的代码生成供我们进行自己的业务改造:
比如我们的适配,首先是定义一个结构体读取我们的腾讯云 SecretId、SecretKey 和 验证码 CaptchaAppId 等配置:
1 | |
然后就是初始化时候读取配置文件:
1 | |
在请求体内添加ticket和randstr字段的映射(CaptchaTicket 和 CaptchaRandstr):
1 | |
在控制层,也就是接口处理函数中,我们就可以通过CaptchaTicket和CaptchaRandstr获取到票据和随机字符串,然后调用腾讯云的接口进行校验:
1 | |
总体来说,还是很简单的。联动一下前端,整个流程就是:
sequenceDiagram
    participant U as 👤 用户
    participant V as 🟢 Vue前端
    participant T as 🛡️ 腾讯云服务
    participant G as 🔵 Go后端

    Note over U,G: 完整的验证码集成流程

    U->>V: 1. 访问页面/触发验证
    V->>V: 2. 检查是否启用验证码

    alt 启用验证码
        V->>T: 3. 加载验证码组件
        T->>V: 4. 返回滑块验证界面
        V->>U: 5. 展示验证码

        U->>T: 6. 完成滑块验证
        T->>V: 7. 返回票据(ticket+randstr)

        V->>G: 8. 发送请求(携带票据)
        Note right of V: 请求体包含:<br/>- Query: 用户输入<br/>- CaptchaTicket: 验证票据<br/>- CaptchaRandstr: 随机字符串

        G->>G: 9. 解析请求参数
        G->>T: 10. 调用DescribeCaptchaResult API
        Note right of G: 验证参数:<br/>- CaptchaAppId<br/>- Ticket<br/>- Randstr<br/>- UserIP

        T->>G: 11. 返回验证结果

        alt 验证成功(Code=1)
            G->>V: 12. 处理业务逻辑并返回结果 ✅
            V->>U: 13. 展示成功结果
        else 验证失败
            G->>V: 14. 返回验证失败错误 ❌
            V->>U: 15. 提示重新验证
        end

    else 跳过验证码
        V->>G: 直接发送请求
        G->>V: 处理业务逻辑
        V->>U: 返回结果
    end
完整的代码可以参考:
未来期待
综合适配体验下来,天御验证码的集成难度相对较低。不过相比极验验证码,天御的适配难度仍然偏高,主要原因如下:
- 官方 Demo 局限性: 官方仅提供 React Demo,虽然在大模型时代框架转换不是难题,但如果能提供 Vue、Angular 等多框架 Demo 会显著提升开发体验
- 社区支持不足: 天御的社区教程,远远没有极验多,甚至没有国内不可用的 Google reCAPTCHA 社区教程多;这不仅体现在接入上,更多的是美化、故障排查只能依靠个人理解和官方支持。当然,这也是一把“双刃剑”,社区上对于极验的破解教程也是非常多。但是验证码本身就是一种限频手段,被
破解反而不是很重要的。
甚至我们 TDP 开发者群的小伙伴,花了一个下午,天御验证码的破解 SDK 就做出来了……
因此,验证码被破解并非关键问题,更重要的是提升开发者体验。期待未来社区教程资源的完善和文档内容的丰富。
从实际使用体验来看,腾讯云的产品和服务表现优秀,这里也对未来发展提出一些建议:
验证码样式创新
- 当前控制台只能设置单一验证码类型,建议支持多种验证方式随机出现,这样能显著提升人机验证的效果
- 可以参考 Google reCAPTCHA 的智能弹出样式,根据用户行为动态选择验证方式
自定义验证码风格
- 目前滑动验证码只能使用系统预设样式,缺乏个性化选择多种并存的方式。
- 建议增加验证码图片主题设置(如海洋风格、都市景观、自然风光等),提升用户体验
- 在审核机制完善的前提下,进一步支持用户上传自定义背景图片,满足品牌定制需求

既然说到验证码本身是一种限评论手段,不妨试试看 Google reCAPTCHA 的评分机制:
END
好啦,今天就到这里了,感谢你的阅读,欢迎交流。
最后,如果你觉得本篇教程对你有帮助,欢迎加入我们的开发者交流群: 812198734 ,一起交流学习,共同进步。
鸣谢: 本次教程的撰写感谢 TDP 小伙伴Ar-Sr-Na、浪疯、阿瑶、轩和没猫饼的技术交流,感谢腾讯云 ASSM 售后服务团队的技术支持 💖。